

Have you made your first design on Figma? Are you ready to put on your big boy pants and add interactions to your design? Then you came to the right article, I am taking us on a journey to understand the elements of prototyping and how to use it
What's the noise about prototypes?
A prototype is a model that shows the intended workings of a product (digital or physical). It can be used to showcase the features the product has and how those features function.
Designers use prototypes to visualize and test their concepts to determine whether they are in alignment with their objectives. We can validate our user flow by testing it with real users to see how short and easy the user's journey is when they want to perform a certain task with the product and iterate on solutions easily and cost-effectively.
Using the Figma tool, we can add interactions and interactive elements to our designs to have a functional prototype that users can interact with.
Interactions have a variety of applications in our designs, When we add interactions to our designs, it helps the users or stakeholders testing them understand the flow of the design and makes them feel like they are engaging with a real product. This allows them to have a seamless experience similar to using a live product and allows them to give useful feedback during the testing.
Figma Prototyping Elements.
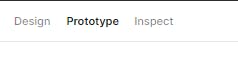
To access the prototype elements to use in your design, open the prototype panel from the top-right corner of the Figma application.
It shows different settings when an element or frame is selected before clicking it versus when no element is selected. I will explain both states below:
A: When no frame or element is selected before opening the prototype panel, you would see the following details below, Let's discuss their use :
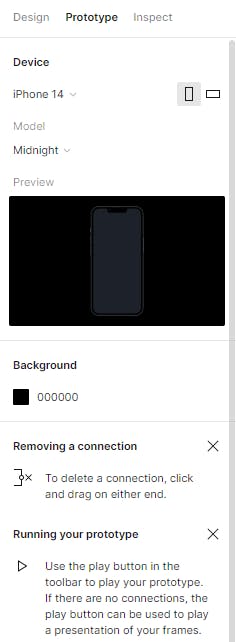
Device: There is a dropdown to select the type of device you want your prototype to show when you present it. You should select a device similar to the frame you used to design your screen for a good outcome. I used iPhone 14 in my design so that is what I picked.
Model: This has a dropdown and a preview of your selected device, you can change the selected device model from the available options in the dropdown and you would see changes in the preview.
Background: You can change the background colour of the presentation where the device is by changing the hex code directly or clicking the colour box and selecting a colour from the colour picker, when you apply this change it also shows in the preview.
Instructions: The other two sections are an explanation of how to remove a connection from a frame when you start prototyping, and the other is an explanation of how to play the prototype to see how it works.
B: When a frame or element is selected before opening the prototype panel you would see the following details below, Let's discuss their use also
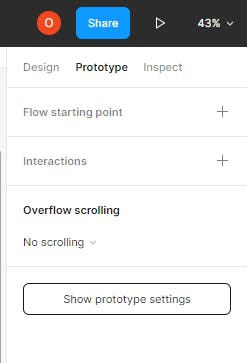
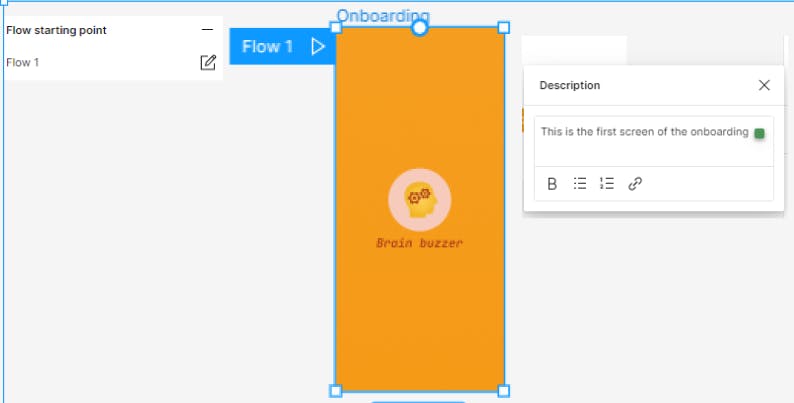
- Flow starting point: If added, the selected frame would be the starting point (first screen) that would appear when the prototype is presented, it also has a pen icon that you can use to add a description of the flow.
- Interactions: This is where the magic happens, so you must pay keen attention. Understanding the interaction details will help you add the right interactions to your design elements. Let's take a look at the interaction details panel.

a. Triggers: This is what activates the interaction in your prototype, from the drop-down, you can choose the type of trigger you want on your prototype to trigger an action. For instance, you can use an on-tap trigger for a button element to take you to another page of your prototype, or a trigger for when you hover over an element and the action that should happen. The names of the triggers are self-explanatory, which would guide you on how to use them, but to further understand each of them, check out Figma's help on triggers for more information.
b. Actions: This is the response that would occur after a trigger has been initiated in the interaction. Clicking a button is a trigger, and navigating to another page is an action that occurred. Figma has a lot of actions that can happen when a trigger is initiated, like scroll to, open overlay, change to, and many others. To find more information on them check out Figma's help on Actions.
c. Animation: This is the transition that happens between elements during the interaction, it is a setting that you can use to choose how smoothly an action happens when a trigger is initiated. This is one of the fun parts of prototyping because choosing the right animation helps your product mimic real-life applications. For more information, read Animations.
d. Easing: This setting helps to choose the acceleration of the transition, it contributes to helping the transition move smoothly and naturally. Check out the Figma help page for more information on easing.
e. Timing: This setting helps to choose the speed of the transition, and it is in milliseconds (ms), so you have to be familiar with the timing to get the desired smoothness.
f. Destination: This is the element, screen, or frame that the result of the action will switch to or be applied to when the trigger is initiated.
- Overflow Scrolling: This setting is used to add horizontal or vertical scrolling to frames
Creating Interactions.
I added some basic interactions to the screens I designed below, the steps to achieve them are outlined in this section.

Step one
Select the frame or element you want to add interaction to and open the prototype panel. The frame will then show four small nodes on its four sides when you hover over it, the nodes are called connection nodes.
Step Two
Click and drag one of the nodes from the selected frame or element to the destination frame to create a connection. Click on the connection node to open the interaction details panel to edit the interaction and choose your desired interaction for the screens.
Alternatively
From the prototype panel, click interaction (+), interaction will be added automatically but no destination frame will be selected, open the interaction details panel and go to the destination option, a drop-down containing the names of the available frames on your Figma artboard will be shown, then select the desired frame. when you go back to your frames you would see the connection has already been made. It is important to name your frames accordingly to identify them easily when using this step.
Step Three
After successfully adding your interactions, you can view the complete prototype when you present it, by clicking the play button ▶ from the toolbar above. A new tab will open in your browser and you can interact with the prototype, share it with team members or stakeholders by clicking the blue share button on the toolbar, and receive comments (feedback) from them.
Click here to view the prototype I did.
Tips:
To restart a prototype press R on your keyboard.
To know elements with interactions, click anywhere on the presentation then a blue highlight called hotspots will show on them.
Using Figma, we can also create complex interactions. In fact, this is a broad topic; you don't need to worry if you find it confusing at the moment. To fully understand these features, we have to continue learning, practising, and experimenting with them.
You can broaden your understanding of prototyping and interactions in Figma by using these resources.
Prototyping in Figma | How to Prototype in Figma? | Figma Tutorial For Beginners | Simplilearn (Video)
Figma Tutorial: Prototyping (Video)
If you made it this far in the article, I hope you learned something. If you are reading my article for the first time, I would like to welcome you 🙋♀️.
Thank you for reading.
Kindly like my article ❤ , drop your comments 💭 and share it with your friends👩🏿🤝👩🏽.
When I am not writing, sleeping or seeing K-drama, I am pushing pixels as a Product designer and I love to do it, you can check out my work on Behance, Dribbble
I would love to hear your thoughts and feedback on this. Have a question? You can reach out and connect with me on social media LinkedIn, Twitter ,Instagram,
Good vibes only, 💛 + 💡, and everything nice.
Best regards Khaerie_talks ❤